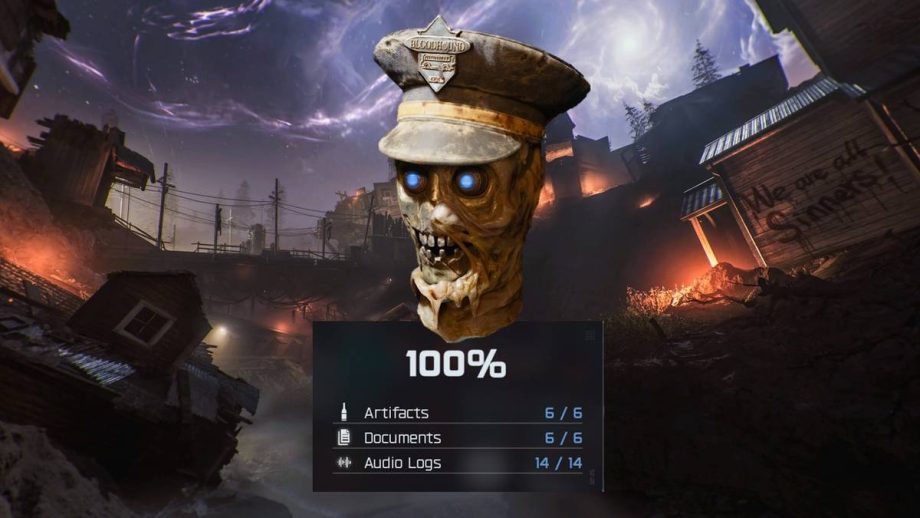
Black Ops 7 Zombies starts its content with Ashes of the Damned, an expansive launch map that proves to be the largest yet. Within this large map, players can find 26 pieces of Intel. With 14 Audio Logs, 6 Documents, and 6 Artifacts to find, players might find it quite the challenge if they go at it alone and unaware. Therefore, we’ve assembled this guide to provide you with all Zombie Intel locations for Ashes of the Damned to begin your journey as the ultimate 100% collector for Black Ops 7 Zombies and its collectibles.
Each Intel collected is 1,000 XP, and upon collecting all 26, you will be awarded 10,000 XP and the Ol’ Tessie Beams Calling Card.

Ashes of the Damned Main Easter Egg Guide (BO7 Zombies)
Here’s a full step-by-step walkthrough of the main easter egg for Ashes of the Damned in Black Ops 7 Zombies so you can easily complete the quest!
All Audio Logs in Ashes of the Damned (14/14)
Audio Log #1 – Tilling the Earth
Head inside the Farmhouse at Vandorn Farm to find this Audio Log within a pan in the kitchen when facing southeast.
Audio Log #2 – Meat the Vandorns
Head into the Cellar of the Barn in Vandorn Farm and look at the southwest wall, where this Audio Log can be found on a shelf, but only after doing the farm ritual in the main quest.
Audio Log #3 – Ground Control
After completing the Serum puzzle at Zarya Cosmodrome, you can find this Audio Log within the Control Room’s southeast wall.
Audio Log #4 – What Came After
Complete the Serum puzzle at Zarya Cosmodrome and head down into the Flame Trench area, where facing north will showcase this Audio Log on a box.
Audio Log #5 – She Got Hers
Found in the kitchen of Reba’s Diner at Exit 115.
Audio Log #6 – He Got His
Head inside McDougal’s Service Station at Exit 115. Found on a shelf when facing northeast.
Audio Log #7 – The Price You Pay
Head into the Tailor Shop found on the east side of Ashwood, by Vulture Aid. Look to the west wall to find this Audio Log.
Audio Log #8 – Craftsmanship
Head into the Ruby Rabbit found at Ashwood’s west side, where you can find this Audio Log on a shelf upstairs when facing north.
Audio Log #9 – Cold Blooded Thriller
Head inside the fishing hut outside the Cabin of Blackwater Lake to find this Audio Log on the northwest shelf.
Audio Log #10 – The Fate of the Flock
Head into the Ol’ Tessie garage in Ashwood and look to the east wall to find this Audio Log on a shelf.
Audio Log #11 – Scene 27 The Drowning
After completing the reels puzzle as part of the main quest at Blackwater Lake, head to the back of the Cabin and look north, where on the railing by the ammo box is this Audio Log.
Audio Log #12 – Study Room Monologue Rehearsal
After completing the reels puzzle as part of the main quest at Blackwater Lake, look out the south window from within the fishing hut for this Audio Log.
Audio Log #13 – Confrontation in the Parlor – Camera B
Enter the Cabin’s upstairs area after completing the reels puzzle, where you will find this Audio Log when facing east, just by the projector reel on top of a shelf.
Audio Log #14 – Director’s Notes: Improv Test
After the reel puzzle, enter the Toolshed and face northeast, where on the shelf below the projector reel, you can grab this Audio Log.
All Documents in Ashes of the Damned (6/6)
Document #1 – Cut
Cut can be found in Blackwater Lake, specifically in the Toolshed. Once inside the Toolshed, you’ll notice that one of the floorboards is a different color from the rest. Stand on, or just before, the miscolored wooden board, and shoot the bullseye on the dartboard to drop the Document.
Document #2 – Maintenance
Head to the Zarya Cosmodrome, where, within the Control Room (behind Wisp Tea), you will find a shelf when facing northeast. Shoot the stacks of papers on the shelves, and you will reveal the Maintenance Document.
Document #3 – Signal Fires
In Ashwood, use the zipline found when facing east. Once you are up top, look back at the Ol’ Tessie garage and walk to the right, where you can drop down to a platform that contains the Signal Fires Document.
Document #4 – Playmates
Inside Vandorn Farm, you will find a bunch of haystacks and haybarrels. Interact with each of them with the reload button until the Playmates Document pops out. We got ours from the middle haystack that was on a cart, just before the Barn.
Document #5 – Evidence
Inside the Exit 115 gas station, McDougal’s Service Station, you can find this Evidence Document underneath two spray cans when facing the northwest side of the room.
Document #6 – Good Game
Purchase Melee Macchiato from the Cabin at Blackwater Lake, or from Der Wunderfizz in Janus Towers Plaza. With Melee Macchiato acquired, head to Janus Towers Plaza and melee strike (with your punch) the tank closest to the Jump Pad to drop the Good Game Document.
All Artifacts in Ashes of the Damned (6/6)
Artifact #1 – T.E.D.D. Head
The T.E.D.D. Head Artifact is the first piece of Intel you will actually acquire, as all you need to do is jump into Ashes of the Damned, open up the Server Room, melee the foor grate, and pick up T.E.D.D. This is part of the main quest and has objective markers, meaning it’s impossible to miss unless you never intend to leave the Janus Towers Plaza spawn area.
Artifact #2 – Mirror of the Forgotten
The Mirror of the Forgotten Artifact requires you to obtain Wisp Tea (purchased from Zarya Cosmodrome, or acquired for free with the Twins EE in Vandorn Farm). You’ll then want to ascend up the zipline in East Ashwood to find the Tailor Shop to the right of Vulture Aid. With Wisp Tea active, it will crack the mirror. You can then shoot the mirror with the Necrofluid Gauntlet to smash it, which will cause the Powder of the Forgotten to drop. Picking this Serum part up provides the Intel.
Artifact #3 – DG-2 Turret
The DG-2 Turret is part of the main quest for Ashes of the Damned, and can only be acquired once you have found all 6 Serum parts and solved the Serum puzzle (we have the solutions to both here). After, you will need to use the Necrofluid Gauntlet to shoot and pull 3 unique keys in the Crashed Rocket, Orda Graveyard, and Grounded Ship areas. With each key acquired, you need to transfer it to the locked chest in West Ashwood’s Rabbit Alley. If you need all key locations in Ashes of the Damned, click here! Then, the DG-2 Turret will spawn after a mid-game cutscene, allowing you to collect this Intel.
Artifact #4 – Seal of Sorrow
The Seal of Sorrow is also unlocked as part of the main quest, and is automatically acquired after you have unlocked the chest found in the west area of Upper Ashwood at Rabbey Alley. The chest unlocks during the main quest after having found and transferred all 3 Keys (found above), and the Intel is claimed after the cutscene.
Artifact #5 – Necrofluid Gauntlet
The Necrofluid Gauntlet is an Artifact that players will automatically get once they complete the Necrofluid Gauntlet quest in Ashes of the Damned. The quest begins with freeing Klaus from jail, who is located in Ashwood Sheriff’s Office, to the left of Vulture Aid. We also have a full quest guide on how to get the Necrofluid Gauntlet that you can find here.
Artifact #6 – Hellion Horn
The Hellion Horn is a death whistle Artifact that players can get as the final step of the main quest. In order to get the Hellion Horn, you must have completed each of the trials in Exit 115, Zarya Cosmodrome, Vandorn Farm, and finally, Blackwater Lake. After completing the Blackwater Lake trial, you can enter the Cabin’s upstairs room, where Speed Cola is located, to find a lockbox covered in wisps. Use a Klaus Summon and bring him here, and ping the box to see him pick up the Hellion Horn, thus providing you with the Intel.

- Released
-
November 14, 2025
- ESRB
-
Mature 17+ / Blood and Gore, Intense Violence, Strong Language, Suggestive Themes, Use of Drugs
