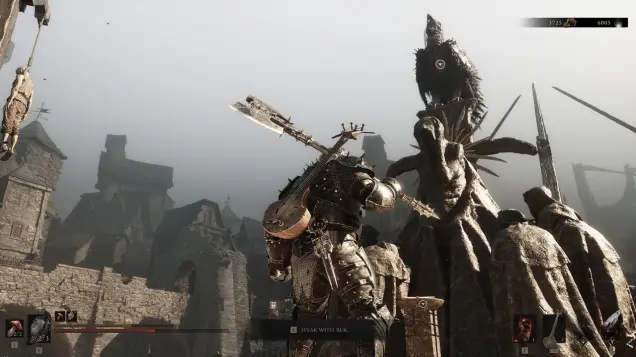
Are you excited to venture across the lands of Fallgrim in Mortal Shell 2? If you played the first game, then you’re bound to see many differences, including an even more expansive world. If you’re a newcomer, then you might feel overwhelmed. Our Mortal Shell 2 guide has over a dozen tips to help you get started on your journey.
The broken realm of Fallgrim: World map and fast travel beacons
Mortal Shell 2 has two major regions: The grasslands and swamps of Fainweald to the north and the foreboding fortresses of Mammon to the south. There’s also Marrow Keep, where most friendly NPCs reside.
As your character, the Harbinger, goes about exploring, you want to keep your eyes peeled for Ruk and beacons. Ruk is a mysterious bird akin to a crow or raven. If you see him perched atop a landmark, chances are there’s a map that you can pick up. Each map reveals a small zone in the region. Beacons, meanwhile, act as bonfires and fast travel points. You can replenish your health and resolve, though it causes regular enemies to respawn.
Related guides:
- All Ruk’s maps and fast travel beacons
- Where to go first

Make the game easier or harder
Soulslike games are meant to be tough and challenging. They’re meant to test your mettle–each death is just part of the learning process, leading to victories that are much more rewarding.
That said, a Mortal Shell 2 tip to keep in mind is that it’s still possible to change the game’s difficulty. Once you pick up an item known as the Slayer Seal, you’ll gain powerful new abilities with your character, including new ways to stagger and stun your foes. Unfortunately, equipping this item also disables achievements for your current save file.
On the flipside, there’s also the option to make the game harder by turning day into night. While “Night Mode” is active, enemies are faster and stronger, though they also tend to drop higher coins and gloom.
Related guide: How to change difficulty – Slayer Seal and Gloombound Flame/Night Mode

Unlock shells with powerful abilities
Similar to the first game, Mortal Shell 2 has you scrounging the world in search of shells. These are the forgotten remains of warriors–some are long interred and buried, while others have just recently passed.
Once unlocked, shells provide you with new ways to eliminate your foes through active and passive skills. For instance, the sneaky Tiel can cloak himself in shadows to stealthily backstab targets. The venerable Eredrim, meanwhile, is a knight who specializes in staggering opponents; the bounty hunter Proxima gets into the thick of the fray with her Biosampler grapple; and the doughy Lazlo is a tanky noble who’s able to beef up his defenses significantly.
Related guide: All shell locations


Make use of Tiel’s sneakiness (left) and Lazlo’s defensive specialization (right).
Leveling up: Gloom and Glimpse
There are, essentially, two intertwined leveling systems in Mortal Shell 2. One involves boosting your character, the Harbinger, while the other involves the shells you’ve unlocked.
Character leveling:
- Uses gloom as a resource. Think of this as similar to souls or runes in other games in the genre. These are lost if you die, but you still have a chance to reacquire them from near where you perished–i.e. “corpse runs.” But if your character dies before they can grab the resource, then it’s gone for good.
- Increases the health of the Harbinger and shells in general.
- Also increases your base damage, shell ability damage, and critical damage.
- At certain levels, you also gain shell points, which are used to activate perks.
Shell leveling:
- You don’t necessarily increase your shells’ levels by earning XP. Instead, you deepen your bonds with them through a resource called Glimpse. These items are often obtained from beacons that you cleanse.
- In most cases, shell bonds are increased via the Shellkeeper NPC in Marrow Keep.
- You unlock additional shell memories, as well as higher-tier perk options. The perks are then selected via the aforementioned shell points.
- Shell points can still be reset, so you’re free to “respec” to come up with a viable build.

Shell bonds and builds: Maxing out bonds, choosing shell perks, and status effect immunity
As mentioned above, you have to spend Glimpse to increase your bonds with shells. In our playthrough, we had obtained the eight shells in the game proper whose bonds can be increased. We had also collected around 90 Glimpse, though we had to use a few so we could permanently summon shell allies during boss fights:
- You only need 1x Glimpse to increase each shell’s bond to level 1. This also unlocks tier 1 perks.
- You need a total of 27x Glimpse to max out each shell’s bond from level 0 to level 4. By then, you’ll have unlocked a shell’s tier 4 perks.
The above gives you a few options for your first playthrough (assuming you decide to spend a few Glimpse for shell summons against bosses):